 I momentarily hang my head in shame that with this post I appear to be following played out hair trends. That is not my goal as a human or an artist or a hairstylist. It is just that……..Well…….This braid is pretty. And it is a good one to know how to do because I want your braid tool bag to be full of every braid trick out the life!
Now my head is higher. Just had to puke that out onto cyber-paper. I feel better now:)
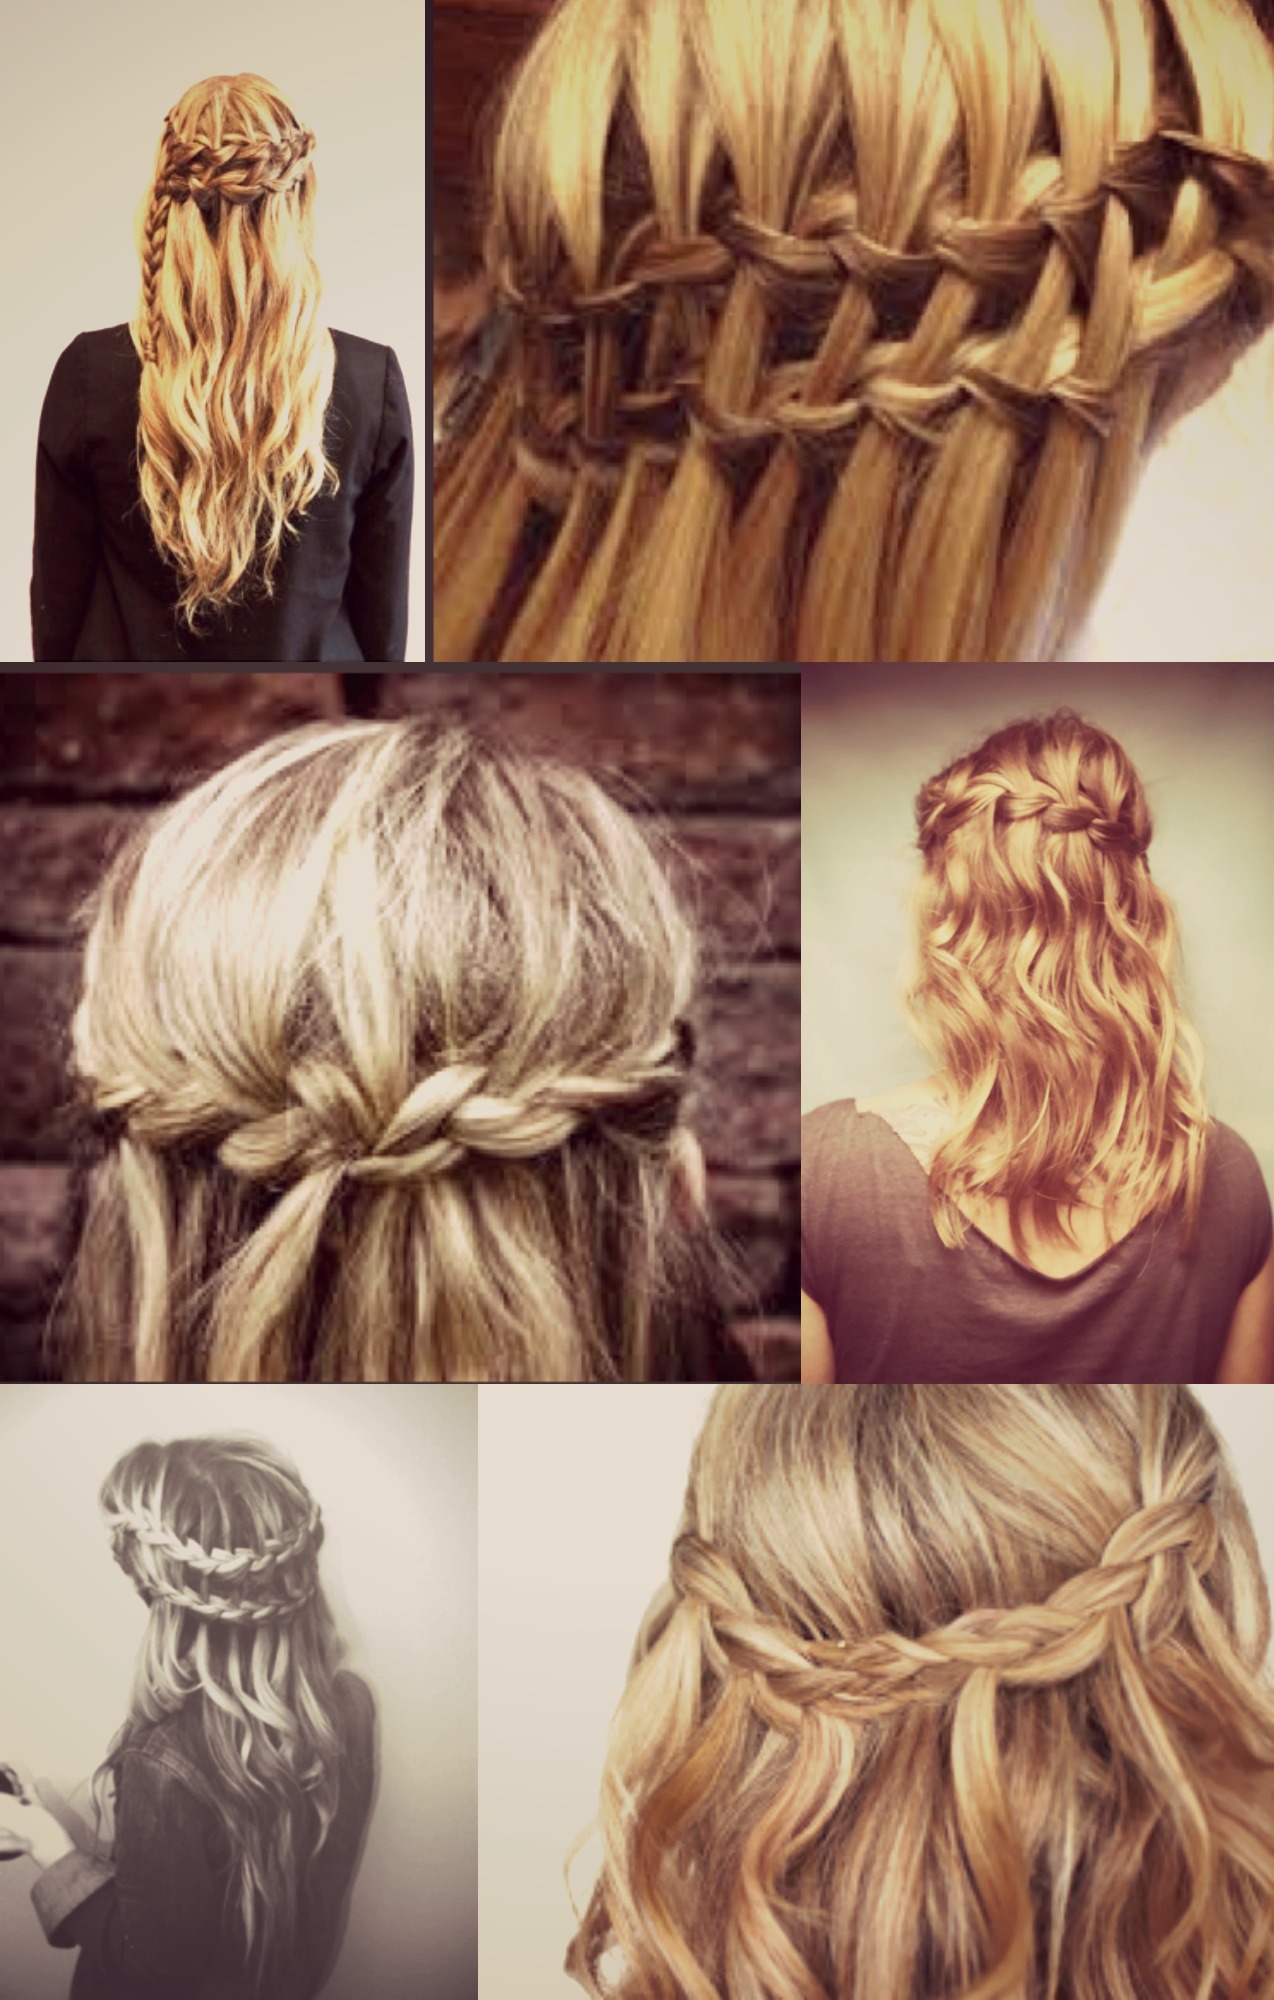
Anyhow, waterfall braids are pretty. And you can do lot’s of different things with them. You can do double waterfall braids. You can do one on each side that meet in the middle. You can pair them with a pretty bun. Check out Hair romance for some gorgeous waterfall braid ideas:)
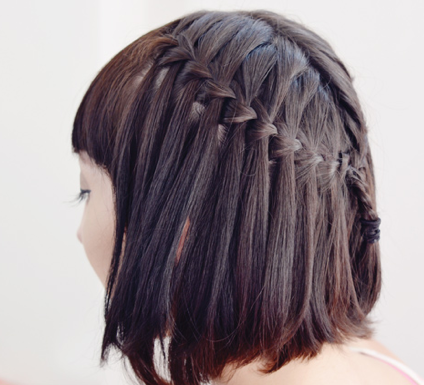 I also want to mention that this is a great braiding technique for shorter hair too. Check this one from Gala Darling!
XO
Here is how to do a waterfall braid. You know how to do a french braid, right?
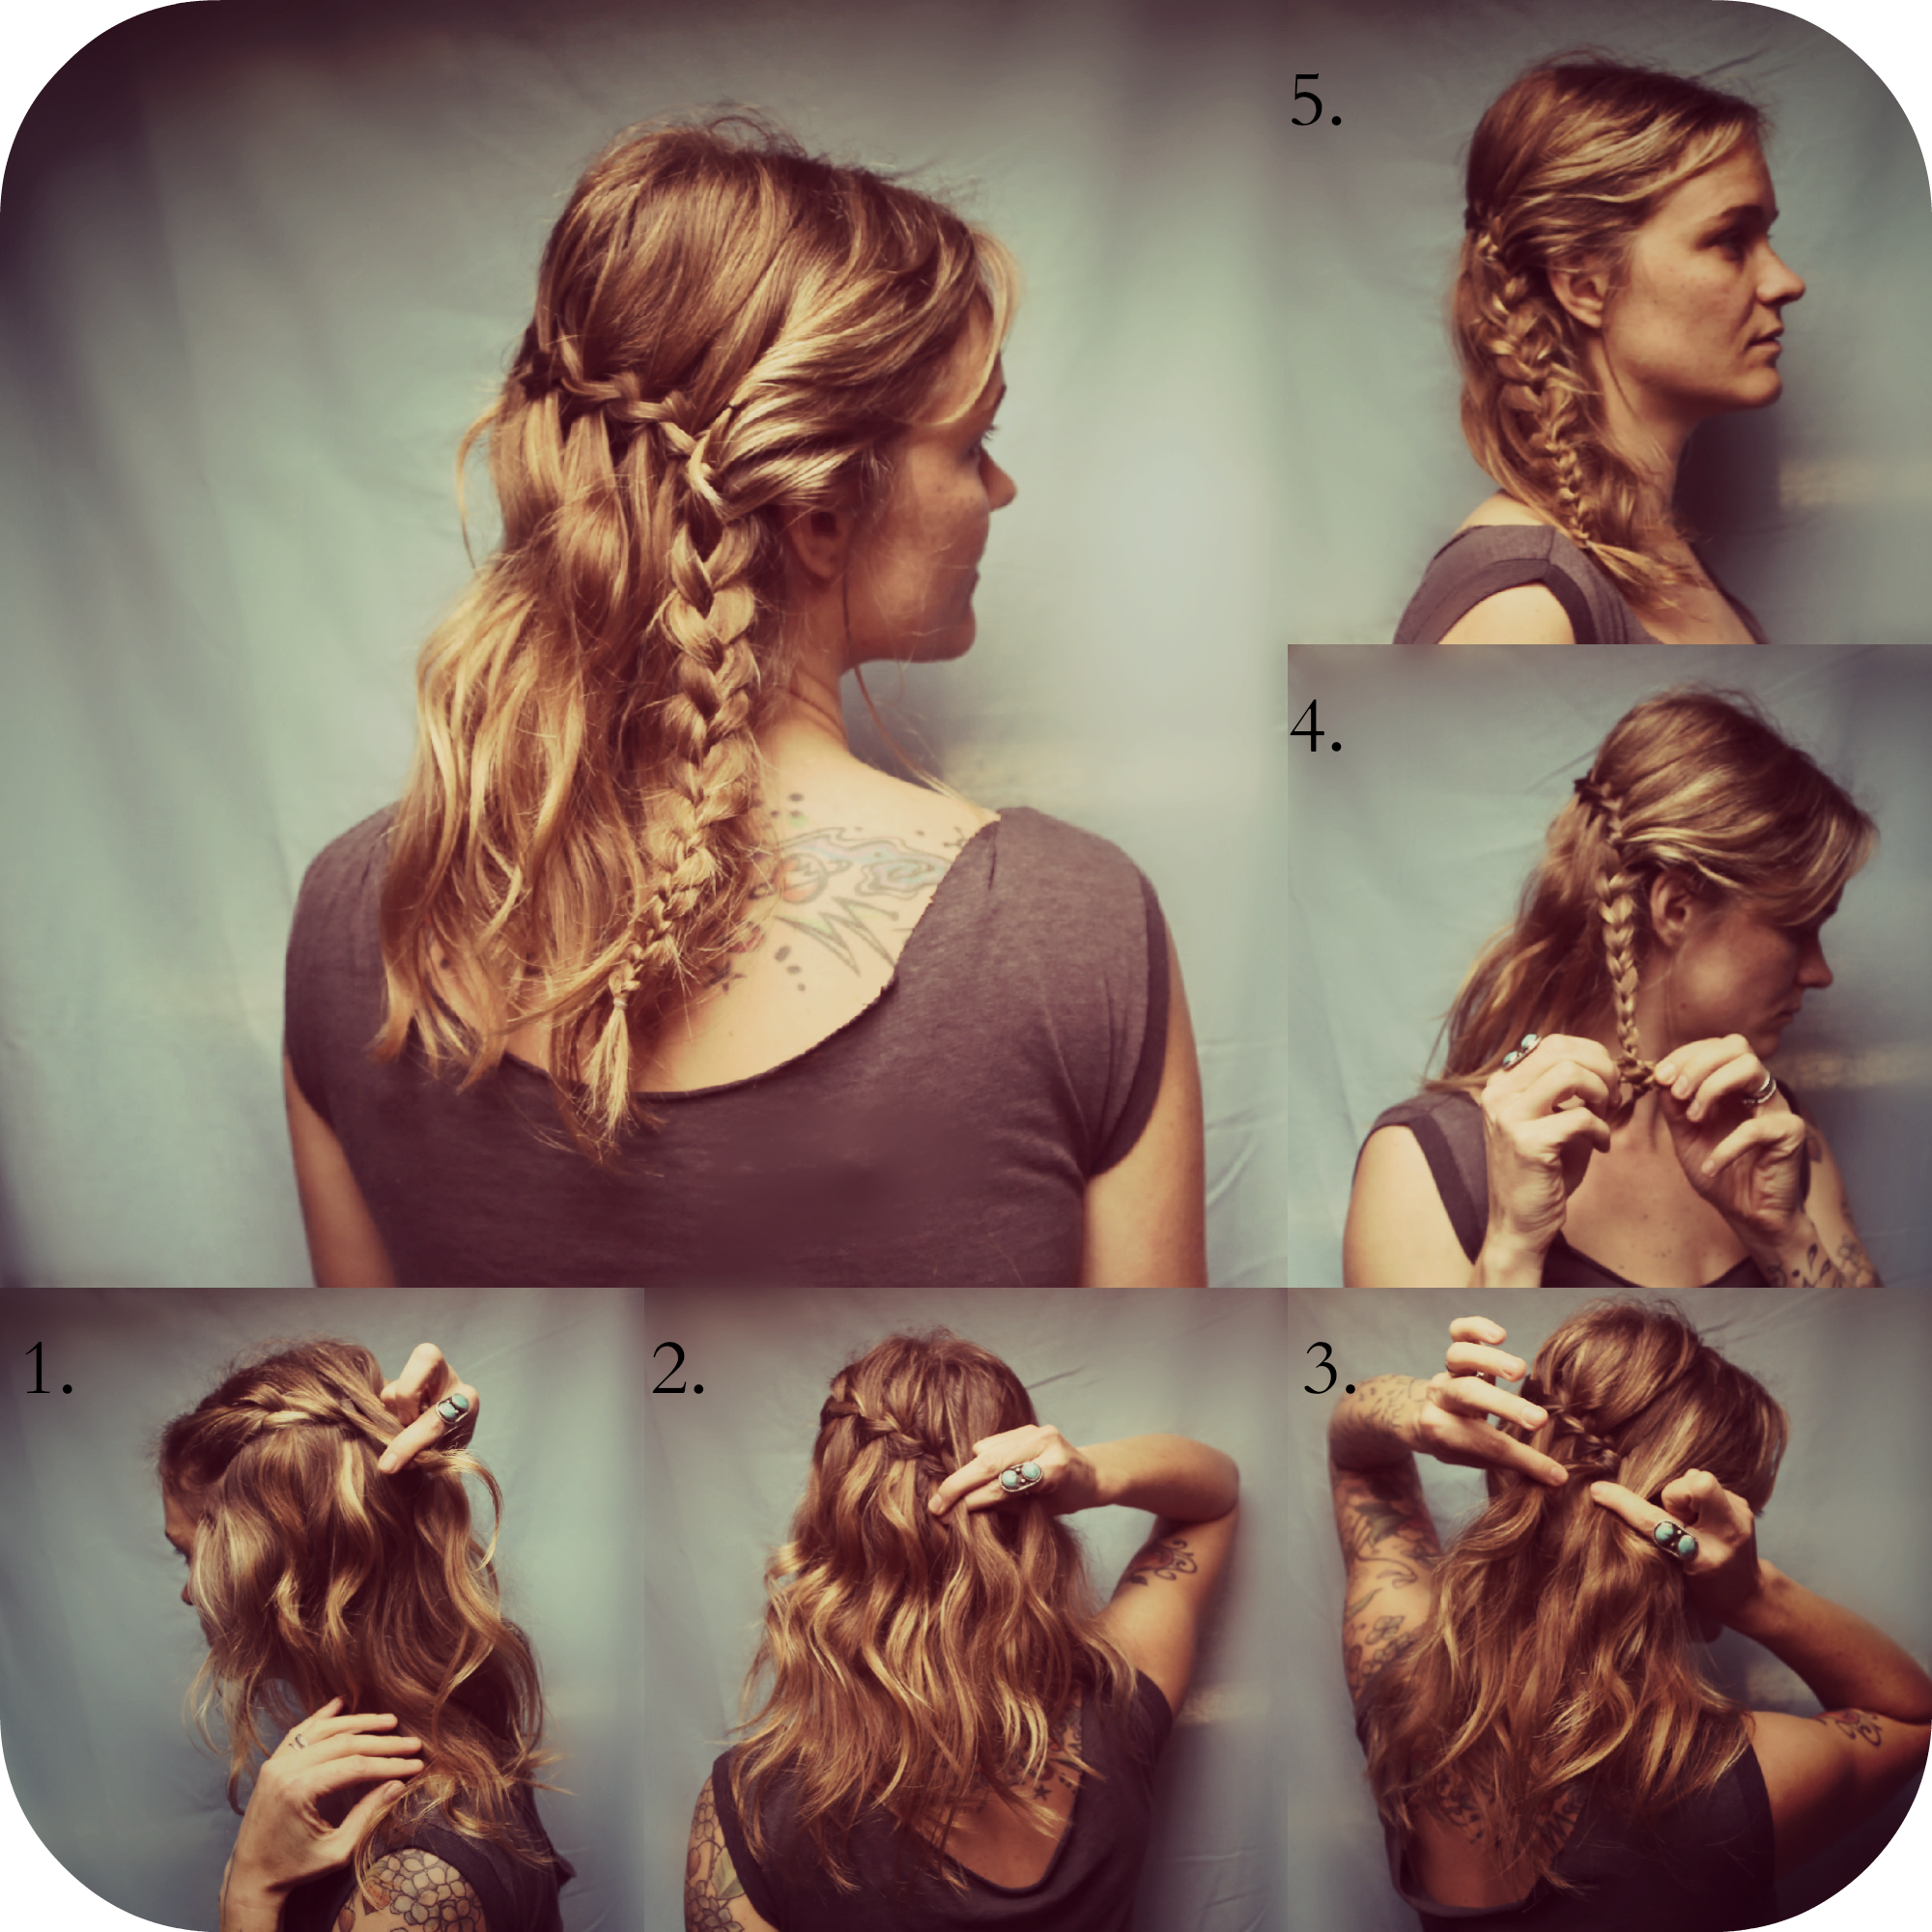 1. Start on one side with 3 pieces of hair. Begin braiding as you would a french braid.
2. When you get to the 2nd overlap coming from the underside of the braid up, drop the piece of hair and let it hang down.
3. Pick up a piece of hair that is roughly the same size next to the dropped section.
4. Braid that piece in. Continue doing this with every overlap from the bottom.
5. Work your way across the back of the head till you get to the other side. you can either stop your braid and secure it with a pin, or braid down the free end and secure with an elastic like in tutorial #2.
I urge you to get creative with the waterfall braid technique!
XOXO, HTHG!


