 Long time coming on this post, considering that I have been giving rag curls to anyone who will let me all Summer long. Now It is time for me to impart my tried and true
DIY rag curl technique to you all, in the simplest terms possible.
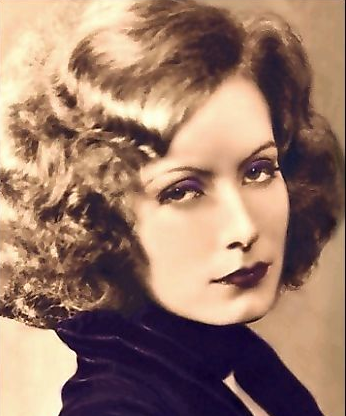 The thing that I really love about rag curls is that people have been doing them for centuries as a way to set straight hair in curls without curlers or heat or really anything but a comb and an old rag. They are easy to do and depending on how you do them, you can achieve anything from Greta Garbo to Veronica Lake to Lucille Ball looking curls without frying your hair.
They are also excellent for lazy-hair people and kids because all you have to do is throw em in your damp hair, sleep comfortably (Without big rollers or poke-y pins) and brush them out in the morning for curls that will literally last weeks if you want them to.
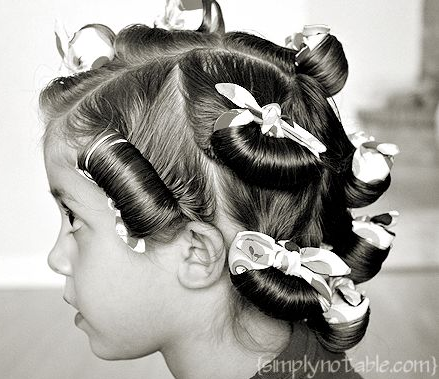
 A couple years back I made a video tutorial of rag curls on my daughter Marley, before I had experimented much with them. Marley has that kind of fine hair that ‘won’t hold a curl’ but by golly her hair will hold a rag curl. Here is more on why no-heat curls are so great for that slippery fine ‘won’t hold a curl’ hair. ( Here is a hint…..It is science!)
The other day, I went to the river with Nikki and my daughters for a day of swimming and a sleepover in her mountain cabin. That night, we drank wine and put curls in our river-damp hair. I rag curled mine, and she twist-bun curled hers (twist-bun tutorial coming soon!)
In the morning, I woke up with purple teeth and a head full of springy wild curls that I wore all day the next day. I even jumped in the river again, head fully under water. My hair dried and the curls were still in full effect. Not sure how that is possible but apparently in is.
Rag Curl Tutorial
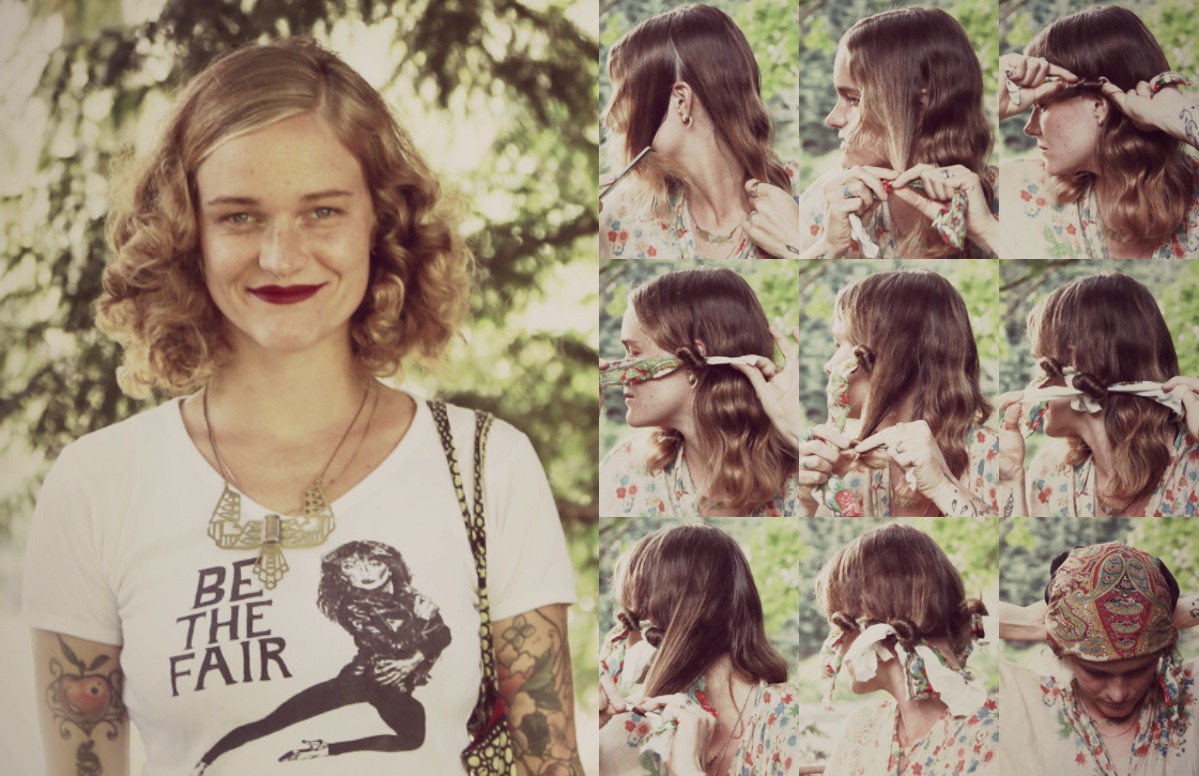 Get an old rag or towel and cut or tear it into strips length wise. They should be at least 3 inches wide and 9 inches long. You will need 6 of them.
Start by dampening your hair with a spray bottle, or let it dry half-way after wetting it fully. I recommend using a sea salt setting spray the give the hair some extra texture if you have curl-resistant hair…It will help you keep the curl even longer!
Part your hair down the center, all the way back. Take your comb and make a parting from the top of the head, straight down to behind one ear.
Comb all the hair in that first section straight down, and grip the ends tightly.
Take a rag and center it right over the ends of the hair. Begin rolling the ends around the rag, making sure to secure them down. The trick is to roll them around once, then roll right over them again so that they are rolled in tightly.
Keep rolling the hair around the rag until you can’t roll any farther. Now, take the ends of the rag and tie them together once to secure the curl. If you are having a hard time visualizing this, please check out this video. It shows you how to do the roll itself, but with a different sectioning pattern that will give you a different looking curl. So watch it just for the technique, but use the hair sectioning pattern from this tutorial;)
Now it is time to make your second curl. You will make another parting that is parallel to the first one, and it will bisect the rest of that half of the head. Basically, it will run from the top of the back of the head, straight down the side to the side of the nape of the neck. Repeat the curl in that section.
The leftover hair from the same side of the head in the back will make your third curl.
Repeat these sections and curls on the other side of the head.
Now, wrap your head gently in a silk head scarf to sleep in. This part is optional, but will help you sleep more comfortably and will help keep your curls smoother.
Now sleep soundly! I often read before bed to help slow down my monkey mind. Occasionally I take a Melatonin for bright and colorful dreams and a deep dark sleep. Mugwort peppermint tea is also great for good sleep and cool dreaming.
When you wake up, brush out your curls with a boar bristle brush ( Mason Pearson is my favorite, it is my # 1 styling tool that I wouldn’t go anywhere without…..Completely worth the price for your brush BFF for life;)
You rag curls are likely to be really big and fuzzy……So go in their with a light smoothing oil like Shiny Dancer, and work it into your curls, gently twisting random ones to define them a bit.
I love to do a deep side part with these curls, because it gives them a very vintage look and makes me feel less clown-hair-ish, initially.
The clown hair will subside quickly, and your curls will relax into themselves throughout the day so REMEMBER……..If you feel way too curly at first, just be patient. Everything will work itself out.
By the end of the day, you will want your hair to stay this way forever.
To make it last, keep your curls dry, sleep with your silk scarf on, and then use some hair powder when your roots start feeling greasy after a couple’a days. That’s how ladies did it in the golden days.
How long can you make your rag curls last? I’d love to know! I challenge you to a whole week 🙂
BTW, Nikki J made the necklace shown in this tutorial, and my t-shirt is from Be The Fair.
xoxox, HTHG

