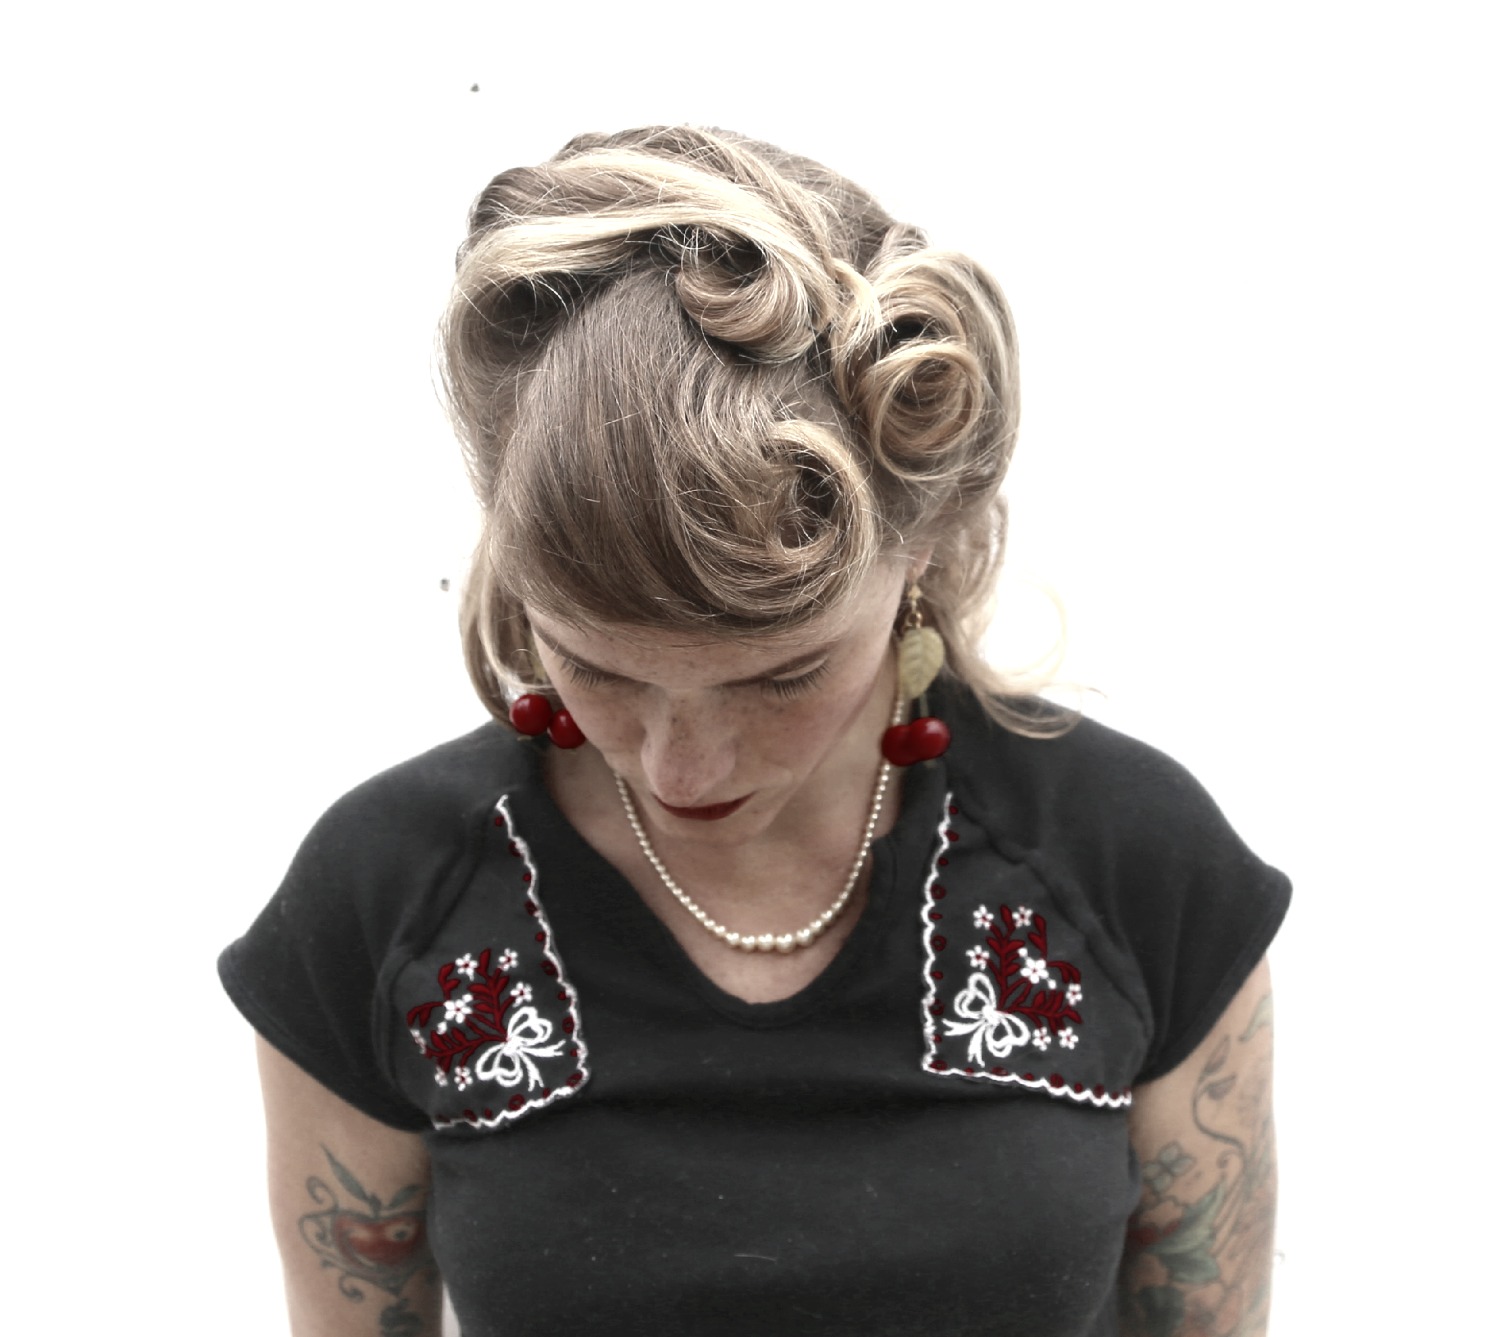
 Today my loves, you get a 4 in 1. 4 vintage inspired hairstyles to get you through the Season. The first is simple classic Victory rolls. Then comes the Half-Up Bump ‘n Roll. Then, then the Ava Gardner. Then, The Full-On Veronica.
These styles are great for a holiday party, so practice up on your 1940’s easy pin-curl set and put this hairstyle and a couple of bobbies and a comb in your back pocket and whip it out in a pinch:)
Last year I gave you Lazy Girls Victory rolls. Today, I give you Victory rolls with a bit more power behind them. This is like your intermediate vintage hairstyle, a bit better than lazy and not your perfect polished perfection. Great for a quick-style but with a bit more planning and staying power;)
Victory rolls can be done on hair that is basically jaw length and longer, so it is a great on for shorter and medium haired girls. Here is how to do it.
Victory Rolls
 Start with your 1940’s pin-curl set.
1. Divide the front section off on one side, from the top of the head to behind the ear.
2. Comb the section hair up and back.
3. Wrap the section around the back of the thumb all the way down to the ends.
4. Gently remove the curl from the thumb and lay it flat against the head.
5. Stick a pin down the inside ridge of the curl, securing it too the head.
6. Shape pull up on the outside ridge to shape the roll, so that it is vertical. Add more pins discreetly as needed. Smooth the front of the roll carefully with a comb.
7. Repeat on the other side.
8. Check the backs of the rolls and pin them discreetly, up the roll from the bottom if needed.
9. Make sure your rolls are balanced. Manipulate them until they look the same on both sides.
The Half-Up Bump ‘n Roll.

This one starts with the 1940’s Pin-curl set.
1. Take the bang section gently back comb the base. Smooth the front and roll the ends back.
2. Pin the curl on one side.
3. Now take the whole top section of the head, leaving out the sides. Back comb using a boar bristle brush.
4. Smooth the front of the section, and take the ends all together and twist them.
5. Now pin the twist to the back of the head with a large vertical bobby going upwards into the twist.
6. Take a side section and twist it back.
7. Pin the twist into your large vertical bobby.
8. Repeat on the other side.
9. Now take ends of all 3 twists, twist them together and pin them into a bun to cover all your bobbies!
The Ava Gardner
 This one also starts with the 1940’s pin-curl set. A more in depth look at rolling bangs can be seen here.
1. Section off the bang section.
2. In horizontal sub sections, work through the bangs, back combing with a comb or boar bristle brush.
3. Smooth the section from the back. Now, roll the bangs forwards.
4. Roll all the way to the scalp. Hold the curl against the head. Now pin the inside of the roll to the base from both sides. The bobbies should grab each other in the middle of the curl.
5. Pull the edges of the roll out a bit to shape and balance it.
6. Section off both sides of the hair. Grab the back section as if you were going to ponytail it.
7. Using your thumb as a roller, roll the ends of the back section upwards to the base of the head.
8. Hold the roll against the head and carefully remove your thumb. Use several large bobbies to pin the inside of the roll to the base of the head from either side, making sure that your bobbies grab each other on the inside of the roll for stability. Use as many as you need till the roll feels secure. Now pull gently at the outside edges of the roll to shape and widen it.
9. Make a pin curl with each side section and pin to the outside of the roll to finish the look.
The Full-Un Veronica
 Start with your 1940’s Pin-curl set.
1. Take the back section and comb it smooth.
2.Roll it under while directing it to one side, so that it spreads across the forehead.
3. Pin the flat curl discreetly on the side.
4. Take a section on the side from the top of the head to behind the ear. Roll it back into a high pin curl.
5. Pin it like a victory roll on one side.
6. Take the other side section and over-direct it. Wrap the ends of it around your thumb to form another curl.
7. Pin it on the opposite side, nestled next to your second curl.
8. Make sure all 3 curls are secure with pins through their centers and under the base so that they are discreet. Add more pins if needed.
9. Check yourself out, you retro babe.
Wham, bam, thank you ma’am, if you will.
XO, HTHG