 There are times in life when it is necessary to call upon the power of our inner warrioress. In times of uncertainty there is nothing more grounding than having our feet strongly planted on the ground, our faces tilted to the sun, and our hair swept back and boldly braided.
Welcome to the 6th edition of HTHG’s Fierce Braids feature. Today, we are going to talk about what I like to call The Ribcage Braid technique, how to do it, and how to use it to create these beautiful Warrioress braids.

This pretty hairstyle is quite easy to do, once you get the hang of the Ribcage Braid technique. Let me break that down for you, as simply as I can so that it doesn’t seem too confusing. Remember, babes……Braiding takes practice, so take it slow and easy. Once you get it, it will click, and then it is yours for life;)
To practice this braid, take a section of hair from the front of your head, on one side and begin a regular 3 strand braid.
Start it off with 3 overlaps.
Now, every time you overlap , take a very small bit of hair from the outside of your section and separate it from the braid, letting it fall out and hang down.
Continue braiding and dropping bits of hair as you go. Your braid should get thinner and thinner as you continue dropping sections.
If you are having trouble, practice this braid in the mirror a bit. Make sure that when you drop your little bits of hair, you separate them cleanly from the rest of the braid so they really fall out of your way. This will help a lot!
As you can see, you have created a braided spine with ribs radiating from it! Nice job:)

Now you are ready for Warrioress Braids!
You will need a small clear elastic and 1 bobby pin for this one. And longish hair, for best results. ( This rules me out, ha! But just looking at this braid makes my hair grow faster;)
Begin by brushing all the tangles out of your hair. Now make a parting on one side of your head, from the top of the head to behind your ear. This will create your first section.
Begin a 3 strand braid with that entire section. After 3 overlaps, begin dropping bits of hair as you braid. Here is the hitch, though……This hairstyle uses a Half-Ribcage (half rack?!) Braid meaning that you drop bits of hair every-OTHER overlap……So pieces of hair fall from only one side of the braid:)
Continue your Half-Rack Braid until it is long enough to reach the back of your head, with a couple inches to spare. Pin the end of your braid for now, to keep it from unraveling.
Repeat a Half-Rack Braid on the other side on your second section. Braid it to the same length as the first. 
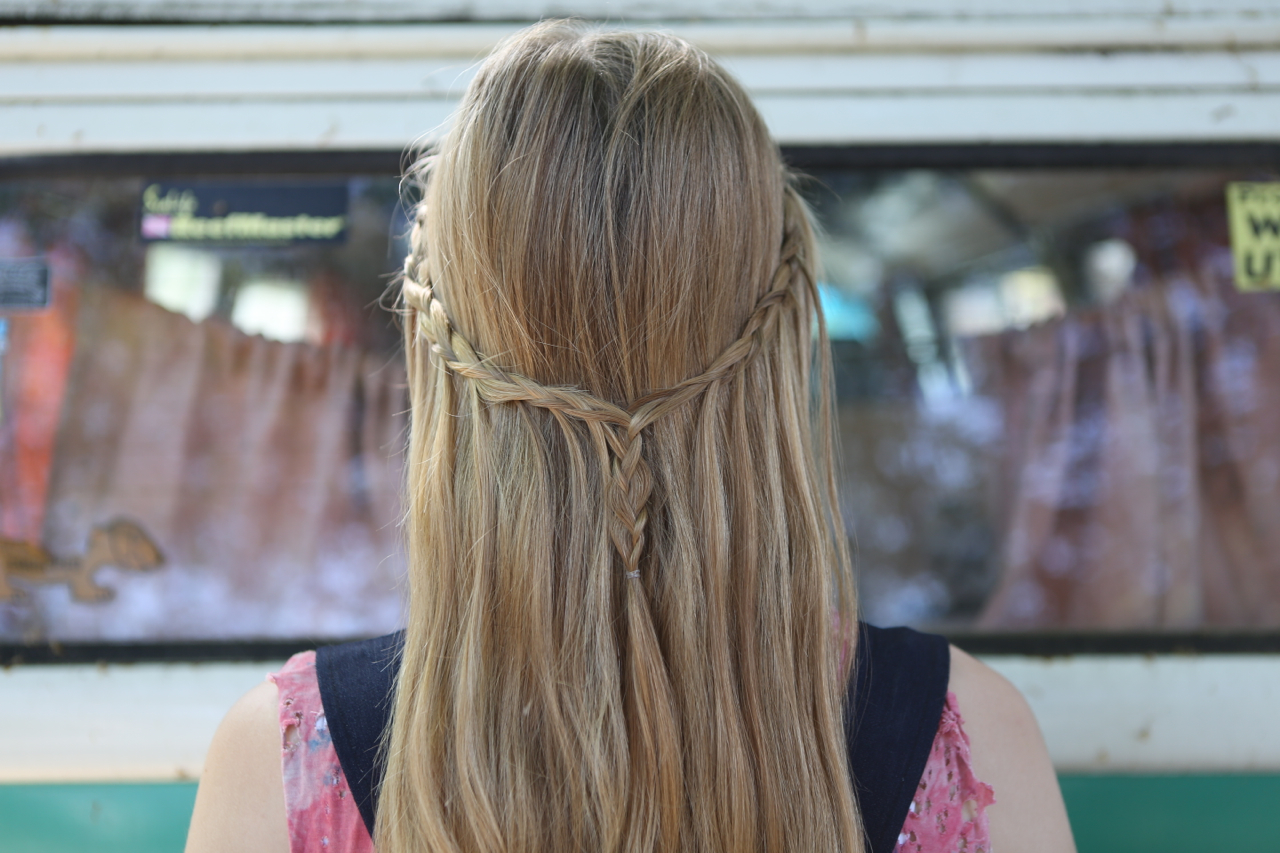
NOW……..Un-pin your first braid, and take a braid in each hand. Join them behind your head. Combine the ends of both braids together, into one section, then split it into 3 and braid them together. Leave long ends hanging if you wish, and secure the braid with your clear elastic.
Grab your bow and arrow and get it, girl.
PS. Digging Birch’s vibe? Her overalls are from HTHG favorites Lykke Wullf, shot-gun blown cropped T from Totally Blown, and Moon-Power neck piece by Rainbow Kimono🙂
xo, HTHG